Natural Photo: A Three-Year Quest for iPhone Images That Don't Look Like iPhone Images
By Justin Wetch
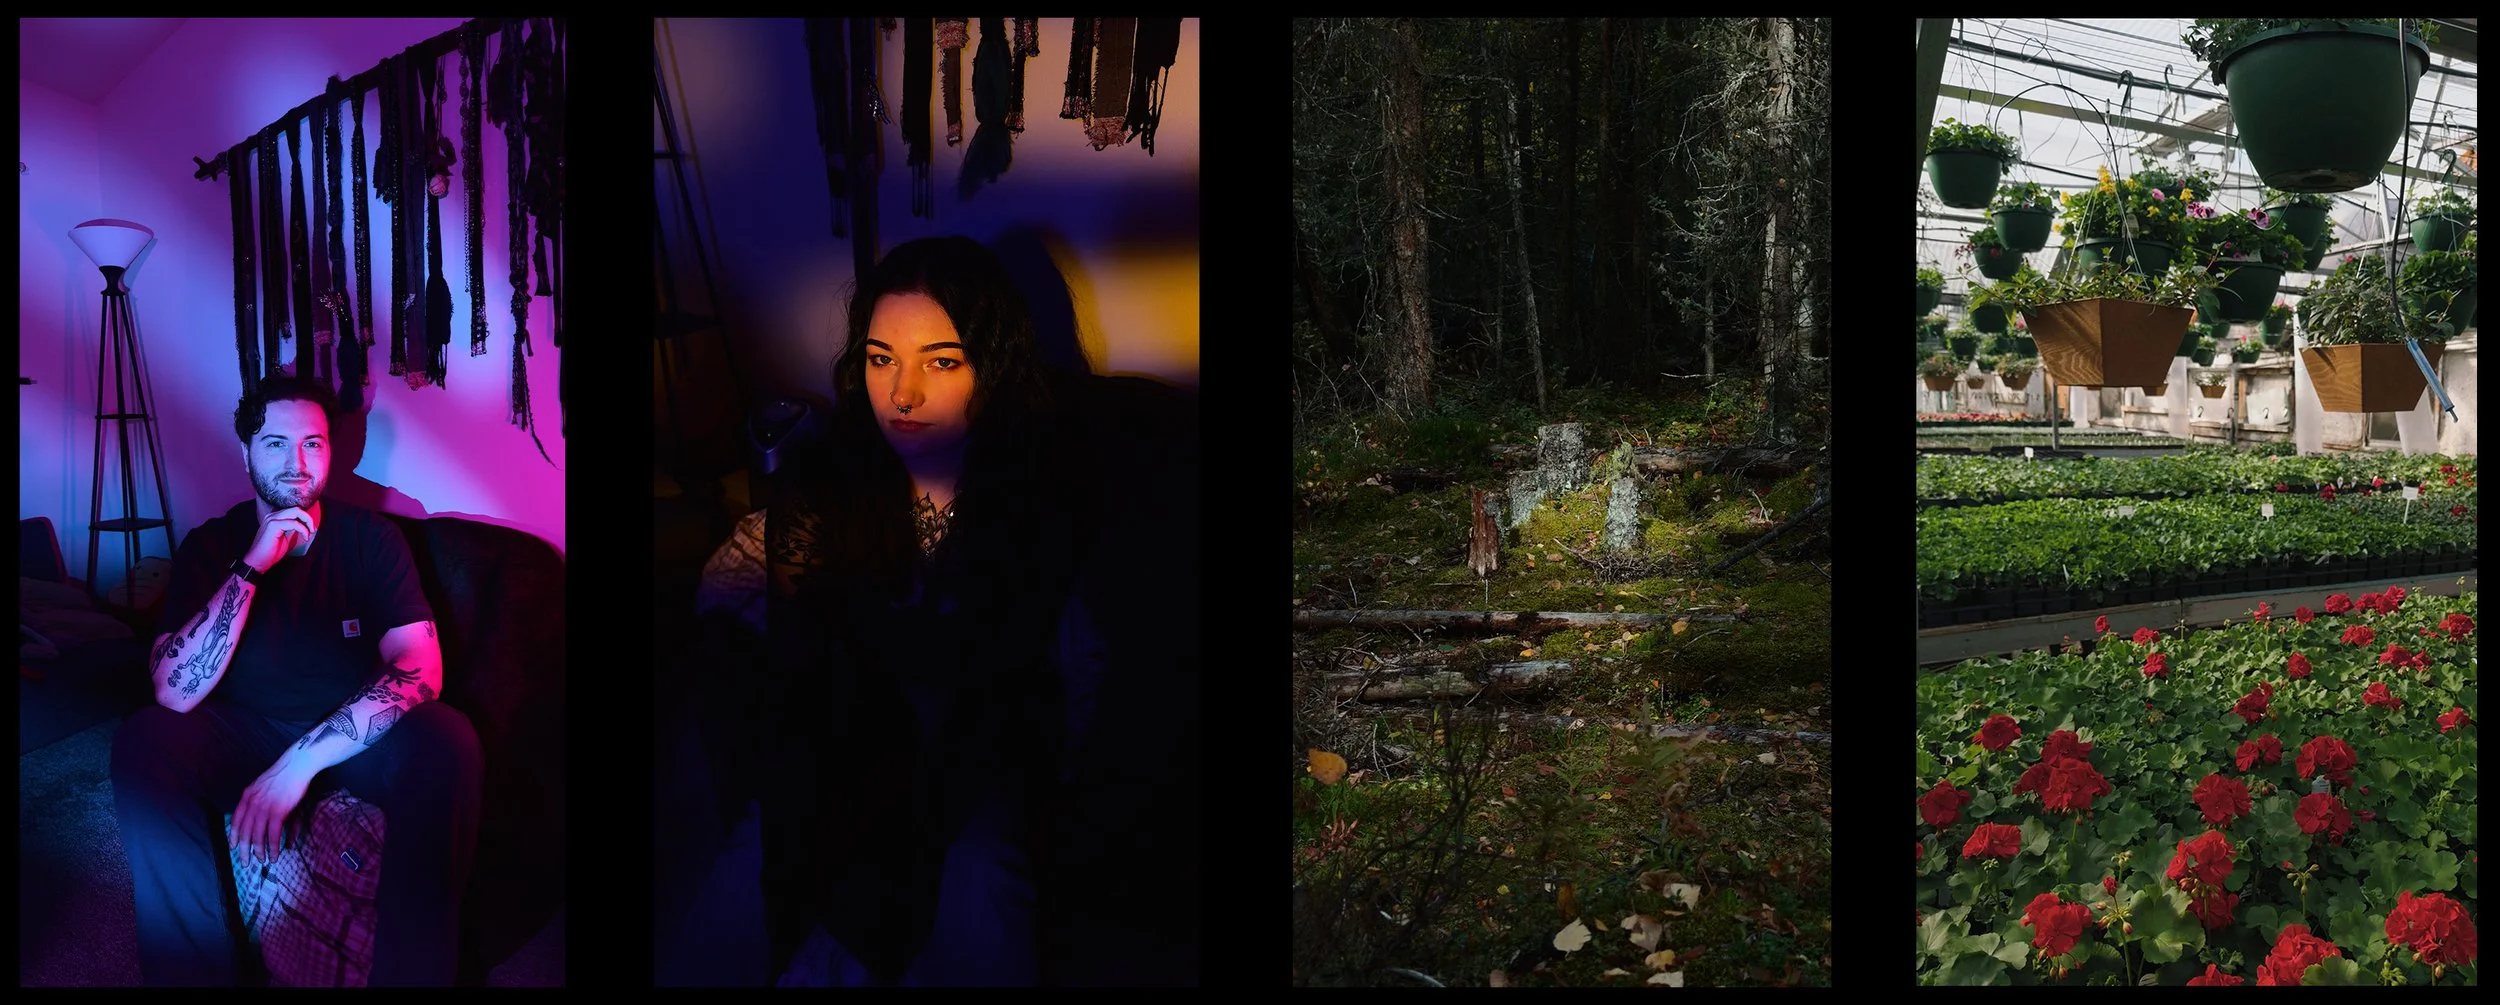
Growing up, my mom was a professional photographer. She taught me everything she knew getting started in Alaska, where I spent my childhood shooting landscapes in wilderness that punished bad exposure decisions. Later I got into cinematography, then 3D rendering, and somewhere along the way I became the kind of person who has strong opinions about color science, who can tell you the difference between Portra 400's highlight roll-off and Kodak Vision3 500T's shadow response, who built a personal LUT that blends characteristics from the Alexa cinema camera with film stock behaviors I've studied for years. When you do 3D work seriously you have to master color science to get photoreal output, so the obsession pays off.
All of which is to say: I know what I want images to look like, and I've spent a long time learning how to get there.
Why iPhone photos look like iPhone photos
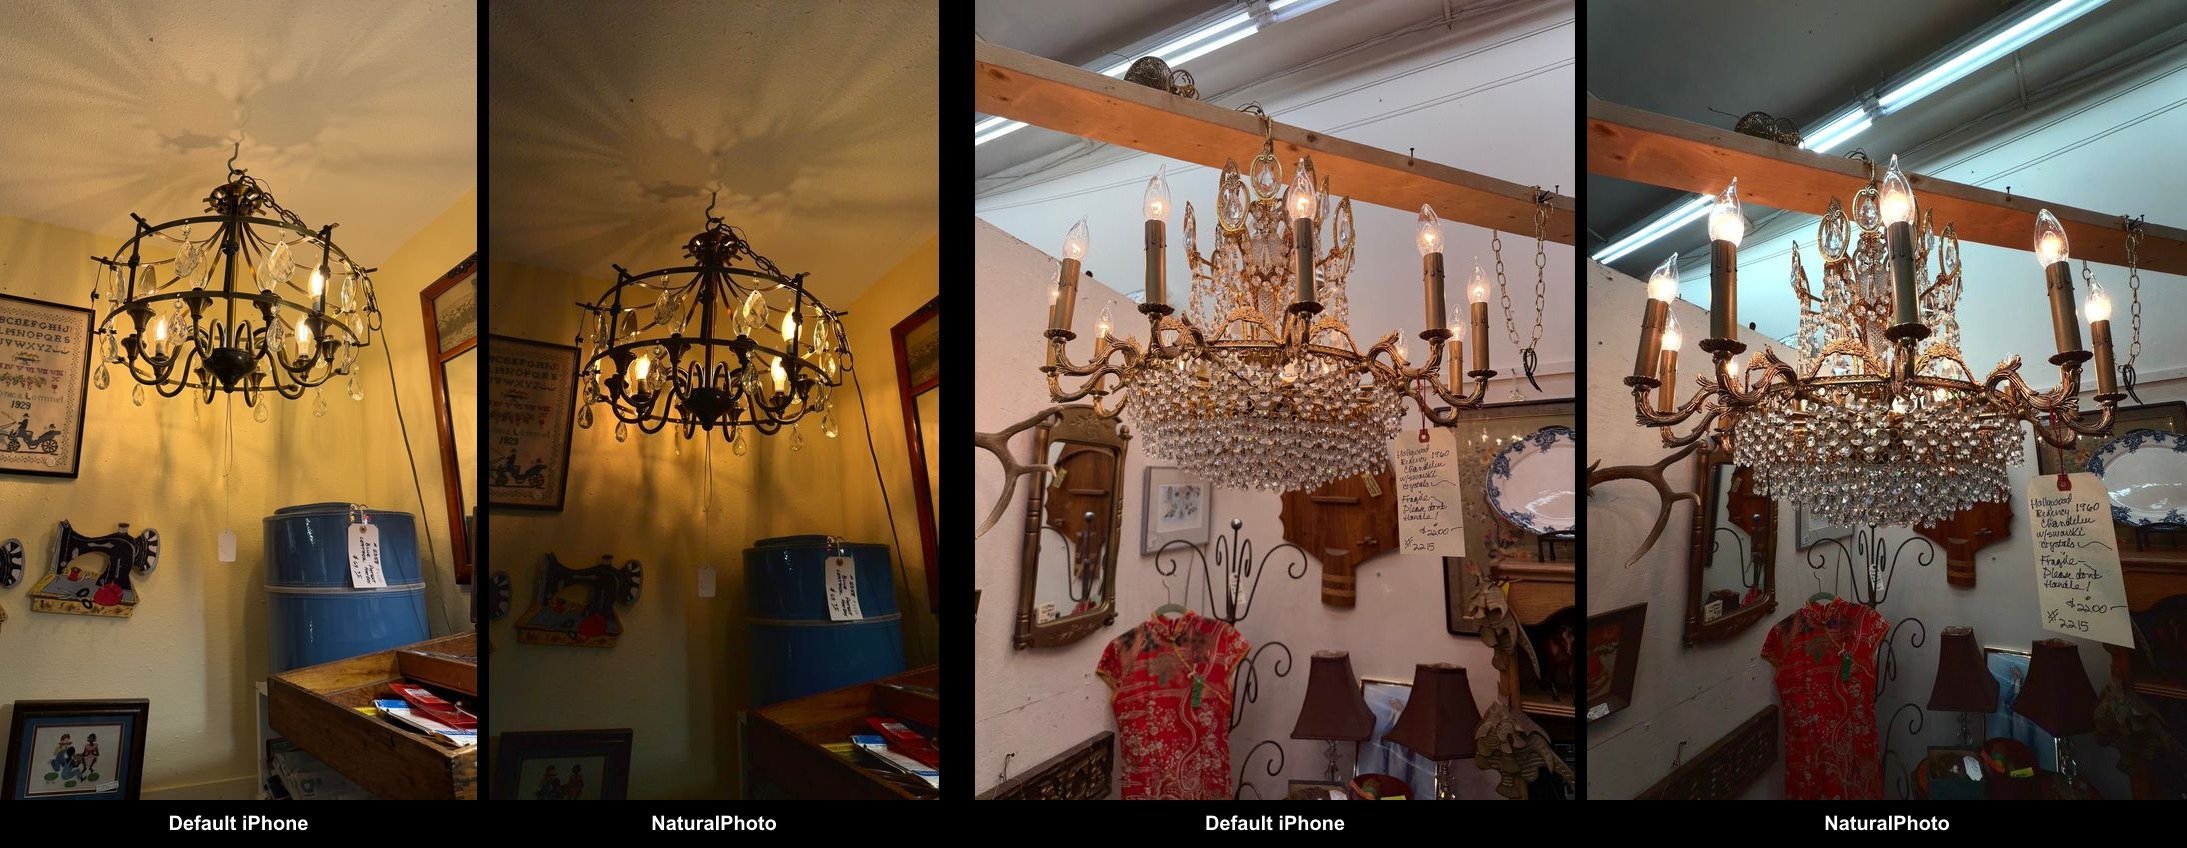
The standard iPhone camera is optimized for the billions of people who want to point their phone at something and get a good-enough image immediately. Apple's computational photography is genuinely impressive for that use case, but the pipeline makes decisions that photographers don't always want. Aggressive sharpening that adds an artificial crispness. Tone mapping that preserves highlights and shadows but destroys any semblance of reality (and looks like an HDR nightmare). The result is a particular aesthetic, technically capable but recognizable, that smell of "this was taken on a phone."
If you care about the DSLR look, about highlight roll-off that feels filmic rather than clipped, about shadows that lift gracefully instead of turning to processed mush, the standard pipeline leaves something to be desired. The processing is the right choice for most people most of the time. It just isn't what I want. Natural Photo is my attempt to solve that very specific problem for myself.
The Apple Log revelation
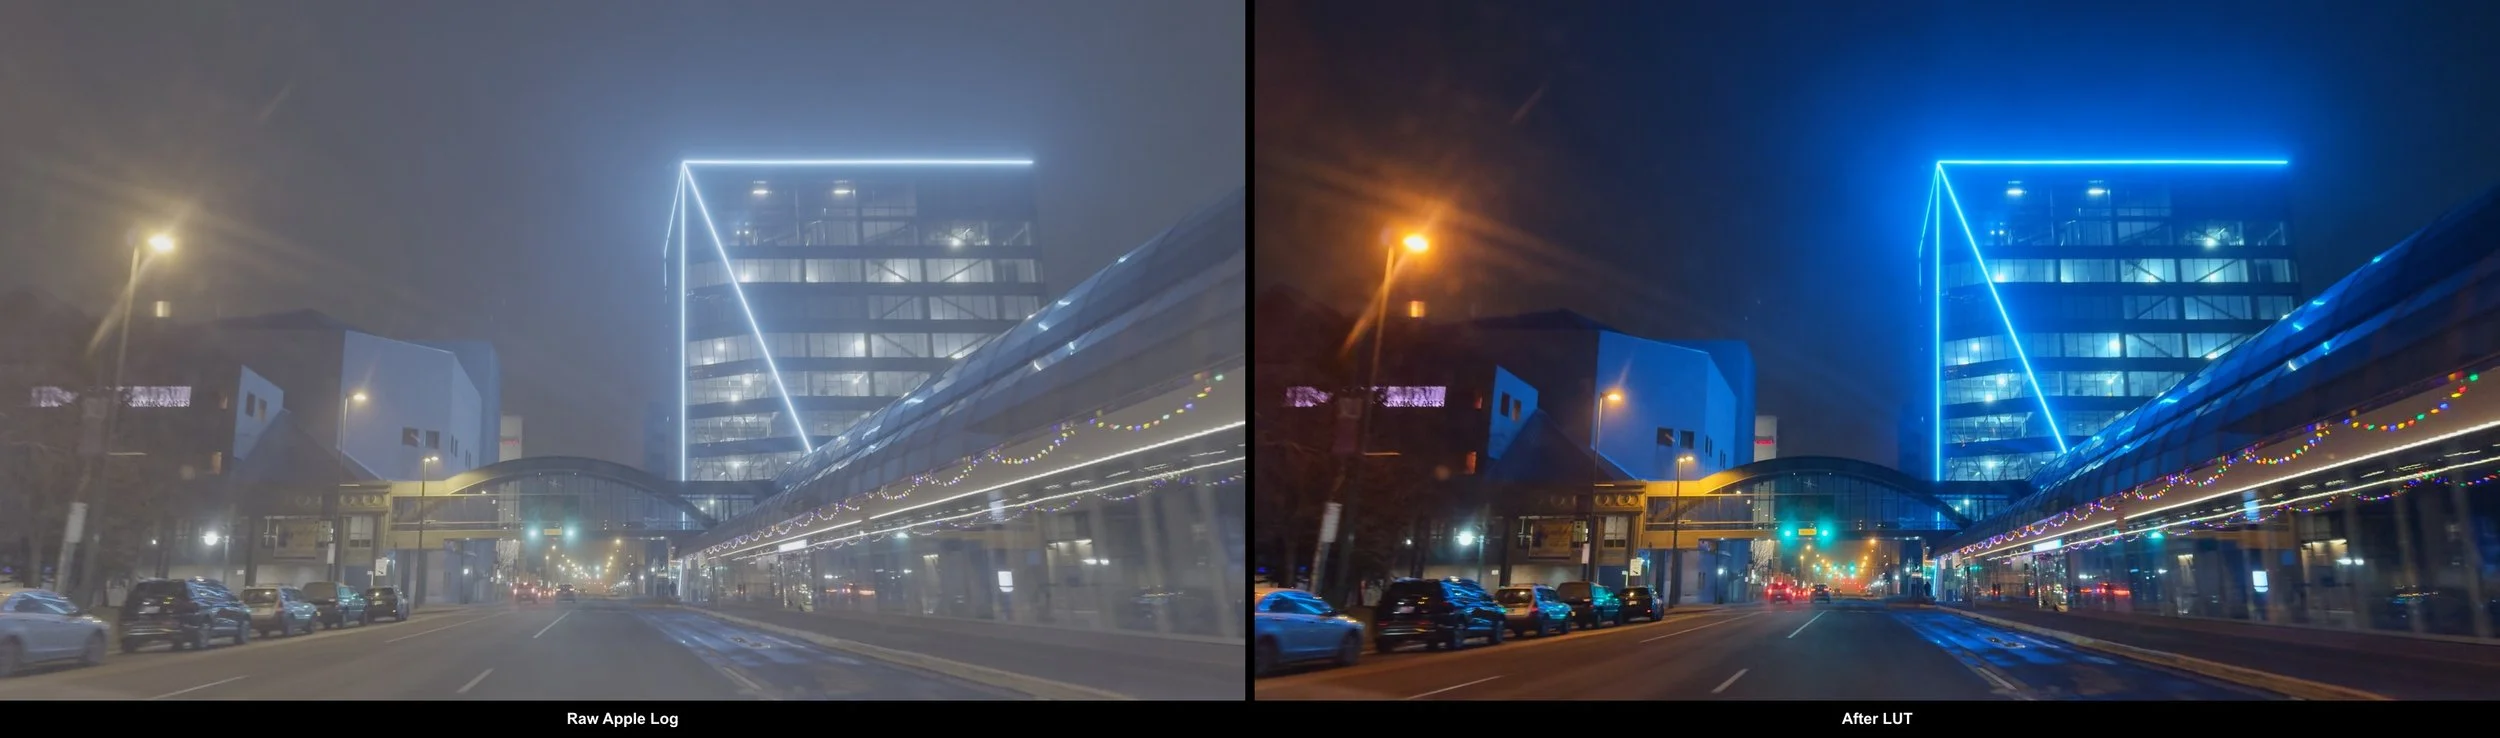
When the iPhone 15 Pro introduced native Apple Log recording, I noticed immediately. For the first time, you could capture the full dynamic range of the sensor, roughly six additional stops compared to standard video, without any of the sharpening and tone-mapping that typically gets baked in. Previous third-party solutions had offered simulated logarithmic capture, but this was genuine sensor output, the real thing.
The footage looks flat and gray straight out of camera. That flatness is potential energy. Apply the right color science, a LUT designed for how you want light to behave, and you get images with character that comes from artistic intention rather than algorithmic processing.
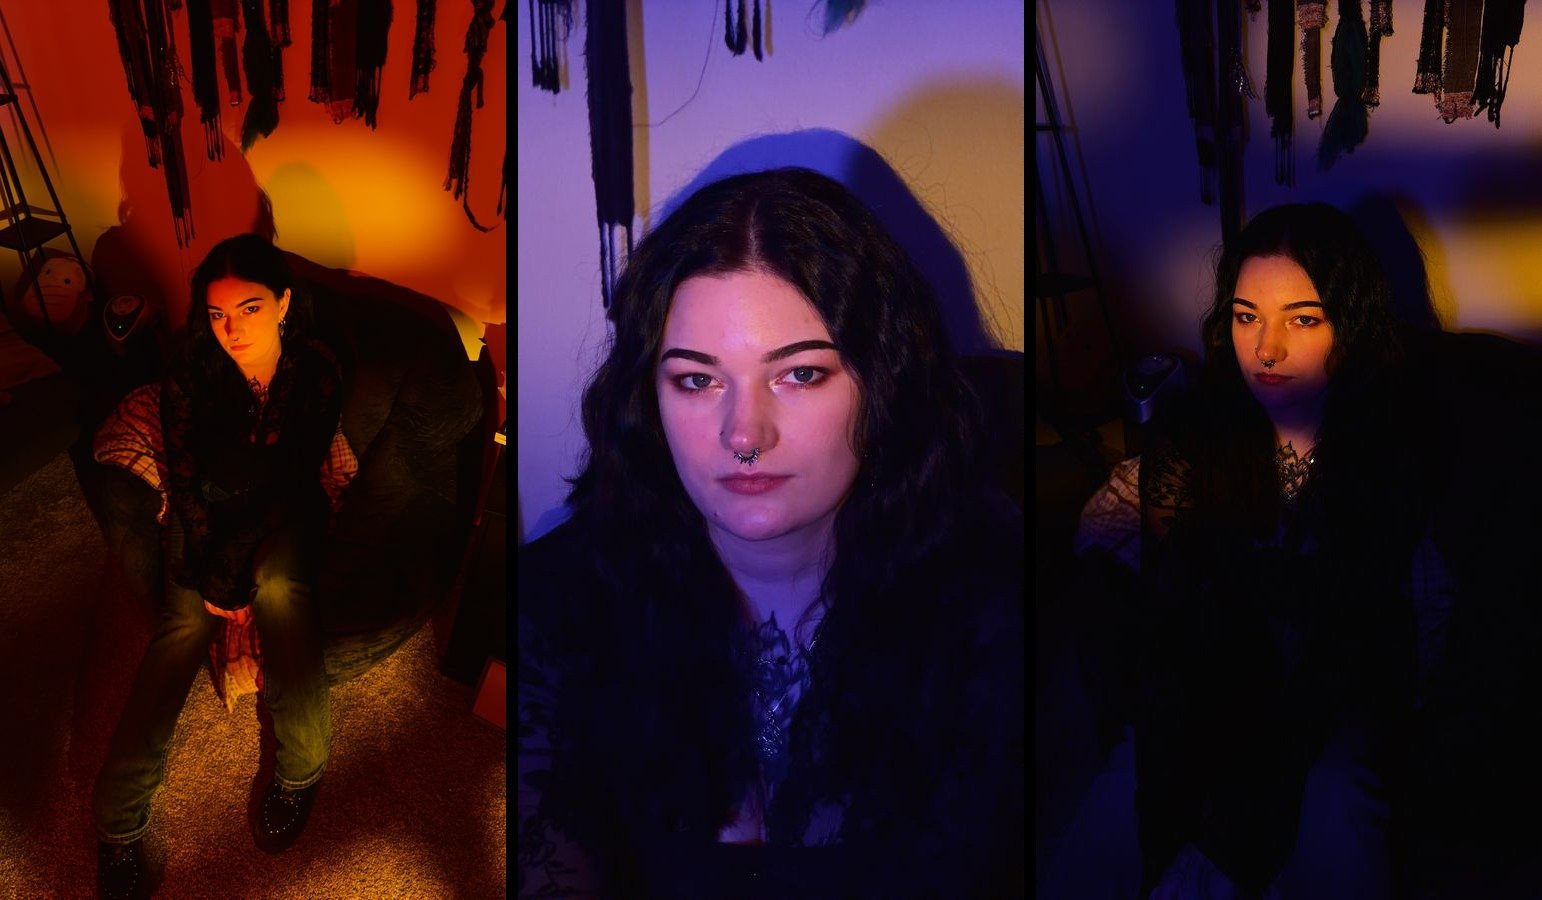
I adapted my personal color science to iPhone’s Apple Log and was impressed with what you could pull from these tiny sensors if you knew what you were doing. The highlight roll-off was pleasing. The shadow latitude was genuinely filmic. People would look at the results and refuse to believe they came from a phone.
But there was a problem. Apple Log only worked for video. To get stills, I found myself literally taking screenshots from graded footage because the quality was so much better than anything the native camera app could produce. This felt absurd. There had to be a better way. And sure, you could always shoot RAW, but that’s a whole other can of worms and doesn’t give you great results straight out of camera like Natural Photo does.
The three-year problem


Starting in 2023, I tried repeatedly to build an app that would automate what I was doing manually: capture Apple Log video, extract a great frame, apply my color science, and output a photo that matches exactly what I saw in the viewfinder. What You See Is What You Get.
I failed every time.
Apple's camera APIs are, to put it charitably, a decade behind their other frameworks. If you're used to developing with modern Apple tooling, the camera stack feels like stepping back in time. Documentation is sparse. Behaviors are contradictory. Edge cases aren't documented at all. I'd get one piece working only to discover that combining two APIs would silently disable a codec, or that my color space would shift somewhere in the pipeline without warning (an absolute nightmare for people who care about rigorous color science).
What finally worked
The breakthrough came with Claude Code running Opus 4.5. I want to be clear about what this means: AI-assisted development is not "solved." This project required constant hand-holding, careful personal research, two steps forward and one step back. The documentation gaps didn't disappear. The API contradictions still existed. But with our powers combined, I finally had enough leverage to push through the accumulated friction that had stopped me every previous attempt.
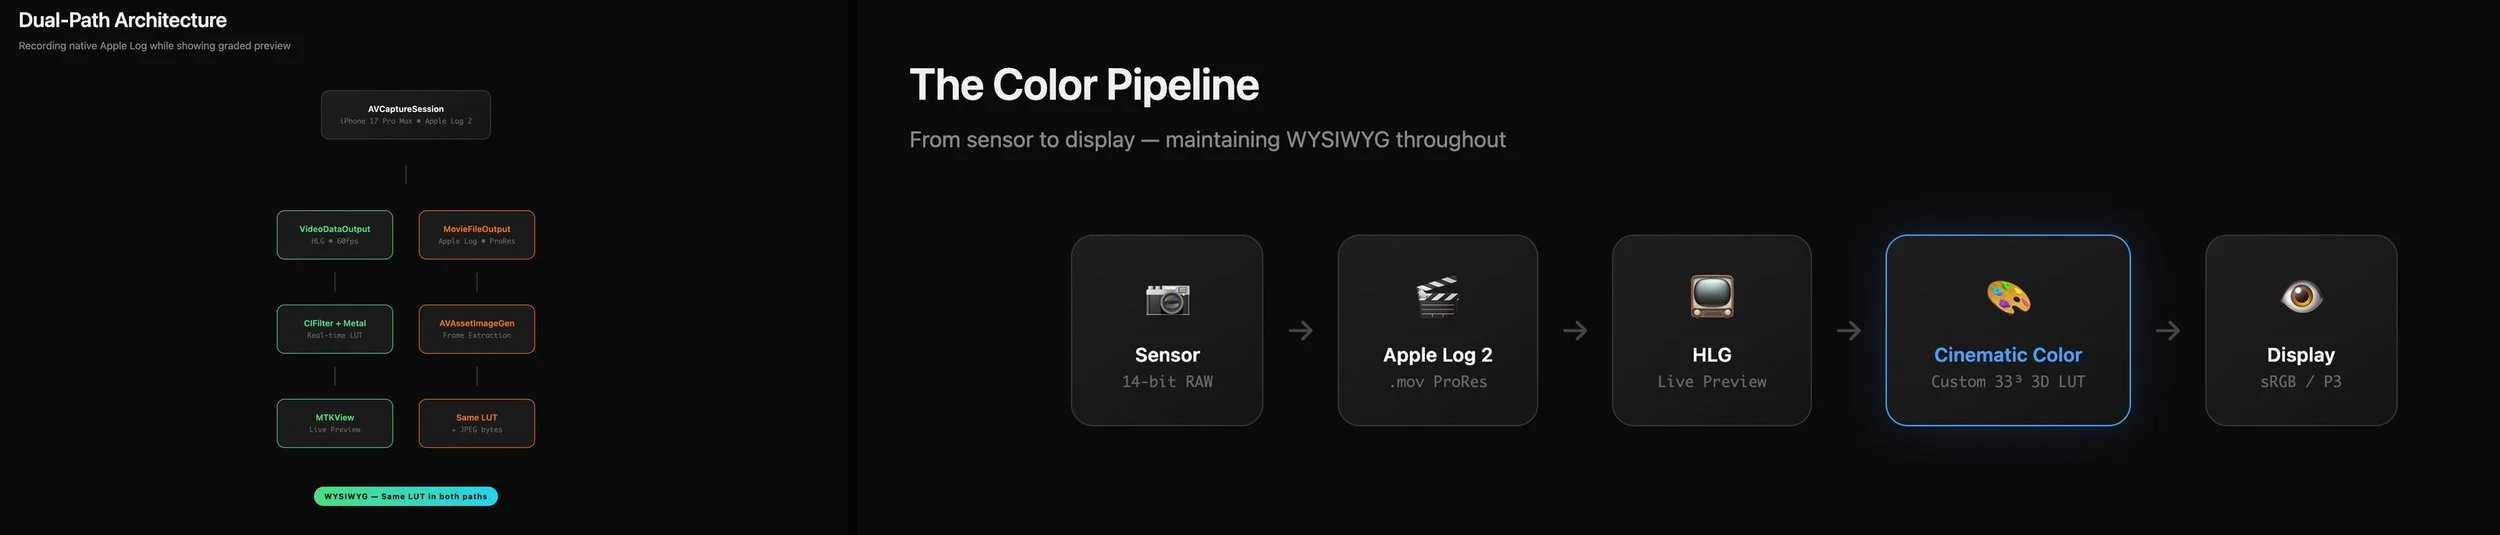
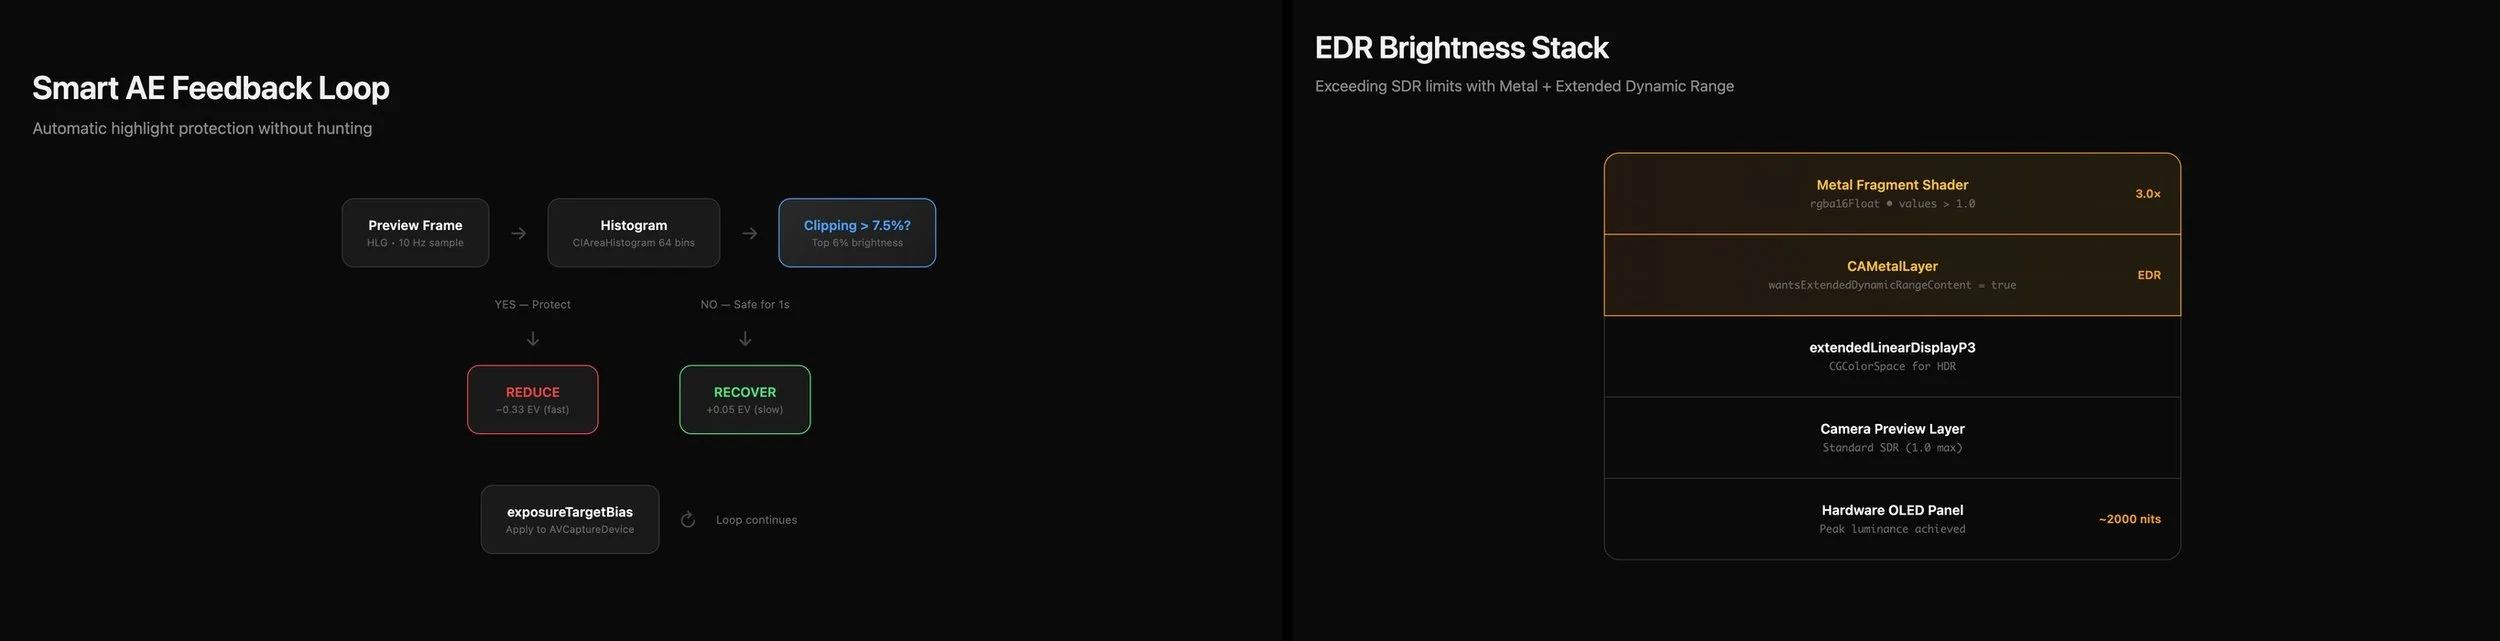
The architecture that shipped is a dual-path system. One path feeds the live preview: frames come in as HLG at 60fps, get transformed through my LUT via Metal shaders, and render to an MTKView. The other path records native Apple Log to disk. When you tap the shutter, I extract a frame from the recorded video, apply the same LUT, and save it.
A brief aside for the technically curious: Apple Log and HLG are different things serving different purposes. Apple Log is the recording format, a logarithmic encoding that preserves maximum dynamic range from the sensor by compressing highlights and shadows into a flat, gray image that's meant to be graded later. HLG, Hybrid Log-Gamma, is a display format, a standard that modern screens can interpret without metadata. iOS converts Apple Log to HLG for preview so you can actually see something usable on screen while the raw log data gets written to disk. My LUT transforms from HLG to my target aesthetic, which is why it appears in both paths: the preview needs it to look right in real-time, and the extracted frame needs the same transformation applied to match.
Same LUT, both paths, WYSIWYG maintained. The preview matches the output because they're transformed identically. Simple in principle. The devil was in the implementation.
The double conversion trap
The bug that cost me the most debugging time: saved images appeared over-saturated and with clearly wrong gamma compared to the preview. Same code, same LUT, visibly different output. I was going insane.
The culprit was UIImage. When you save through the standard iOS path, the system performs an automatic color space conversion that nobody tells you about. Wide color gamut goes in, sRGB comes out squared, and your carefully graded image gets mangled silently.
The fix was to never let UIImage touch the data. Render to a CIImage, generate the image bytes directly, save those bytes to Photos. No intermediate conversion, no silent transformation, no mystery saturation shifts. The current pipeline saves as 16-bit HEIC rather than JPEG, which preserves the full precision of the LUT transformation and eliminates banding in highlight gradients. (Banding in highlights is one of those things you can't unsee once you notice it, and JPEG's 8-bit depth just isn't enough when you're doing careful color work.)
The color pipeline
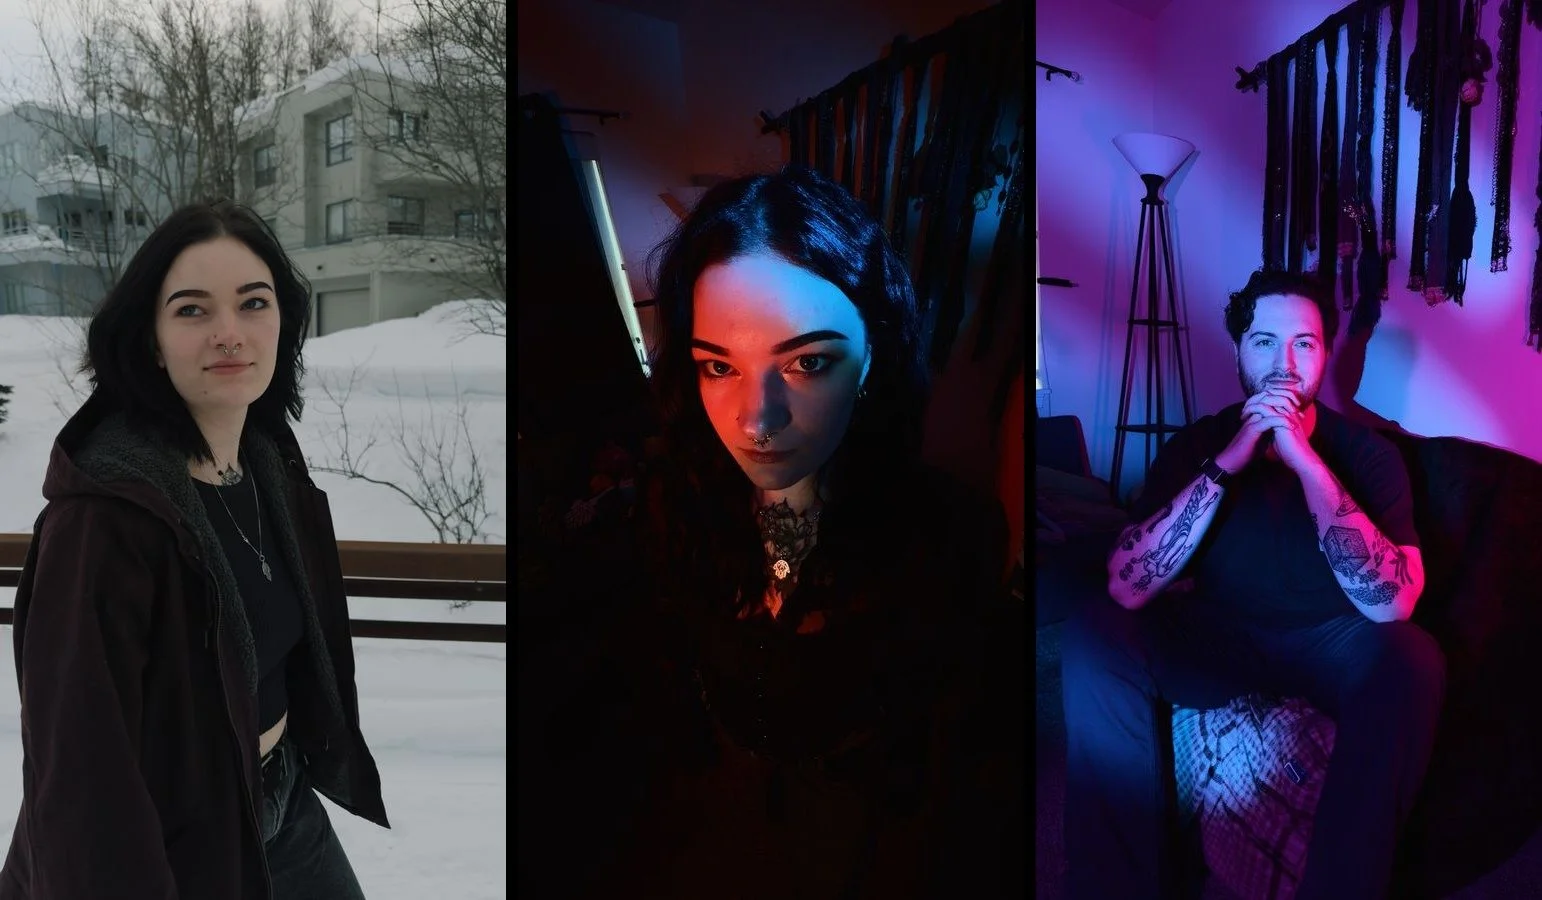
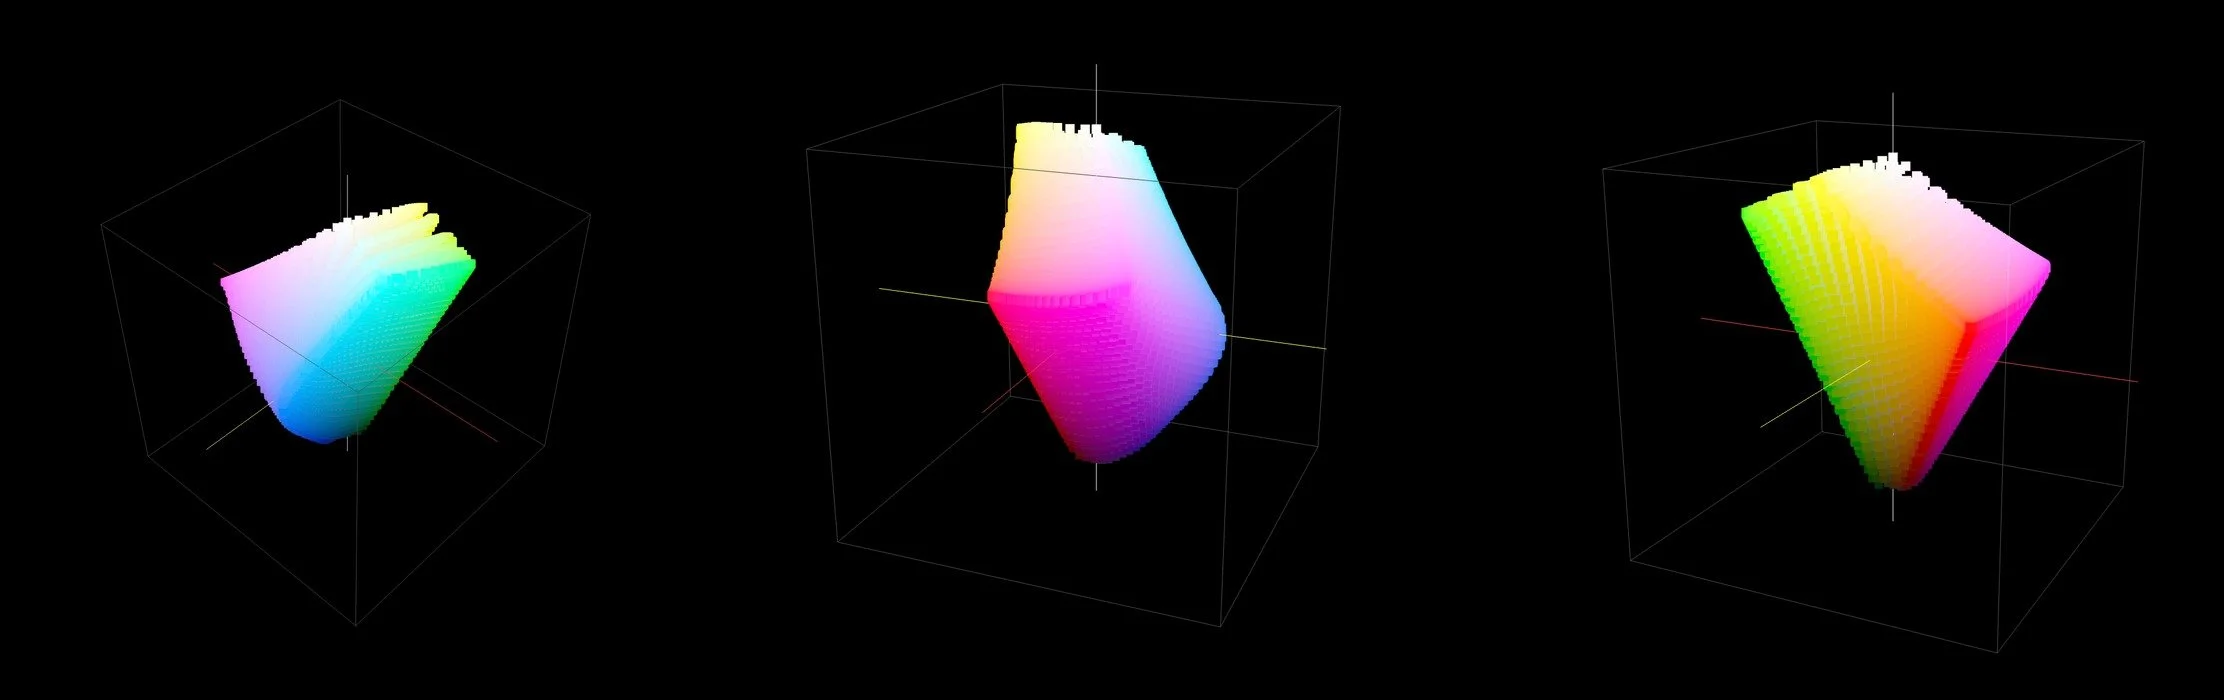
The heart of the system is a 33-point LUT I call "The Wetch Grade." It transforms HLG color space (in this case) directly to my target aesthetic, prioritizing skin-tone reproduction and highlight roll-off, bypassing the traditional reconstruction paths that would add their own character. The transformation is opinionated. It looks the way I want images to look, informed by years of studying cinema cameras and film stocks.
Protecting highlights automatically
Cinematographers talk about "exposing to the right," protecting highlights and trusting your format's shadow latitude to recover the dark end. Apple Log has excellent shadow latitude. So the app defaults to underexposure, negative 0.4 EV, biasing toward highlight protection, which happens to match my aesthetic preferences anyway. I can't stand a blown-out highlight.
But I wanted something smarter than a fixed bias. The app runs real-time histogram analysis at 10Hz using a three-zone system: a 64-bin brightness histogram split into shadow, approaching, and clipping regions, each with its own threshold. If more than 3% of pixels land in the clipping zone, exposure drops fast, a sixth of a stop per correction. If they're in the approaching zone, the correction is gentler, a twelfth of a stop. The system is also bidirectional. Early versions only watched the bright end, which meant that in a dark scene, the highlight protection would chase exposure down until the shadows drowned. Now, if more than 40% of the frame falls into the shadow zone after a correction, the system actively recovers, refusing to sacrifice the whole image to save a few hot pixels.
The asymmetry between correction and recovery is what keeps the whole thing stable. Early versions had a nasty oscillation bug where aggressive highlight protection would clear the clipping, then recovery would overshoot back into danger, creating an infinite loop between protection and compensation. The fix was making recovery very slow, plus 0.05 EV steps with longer delays, so the system settles into stability rather than hunting forever.
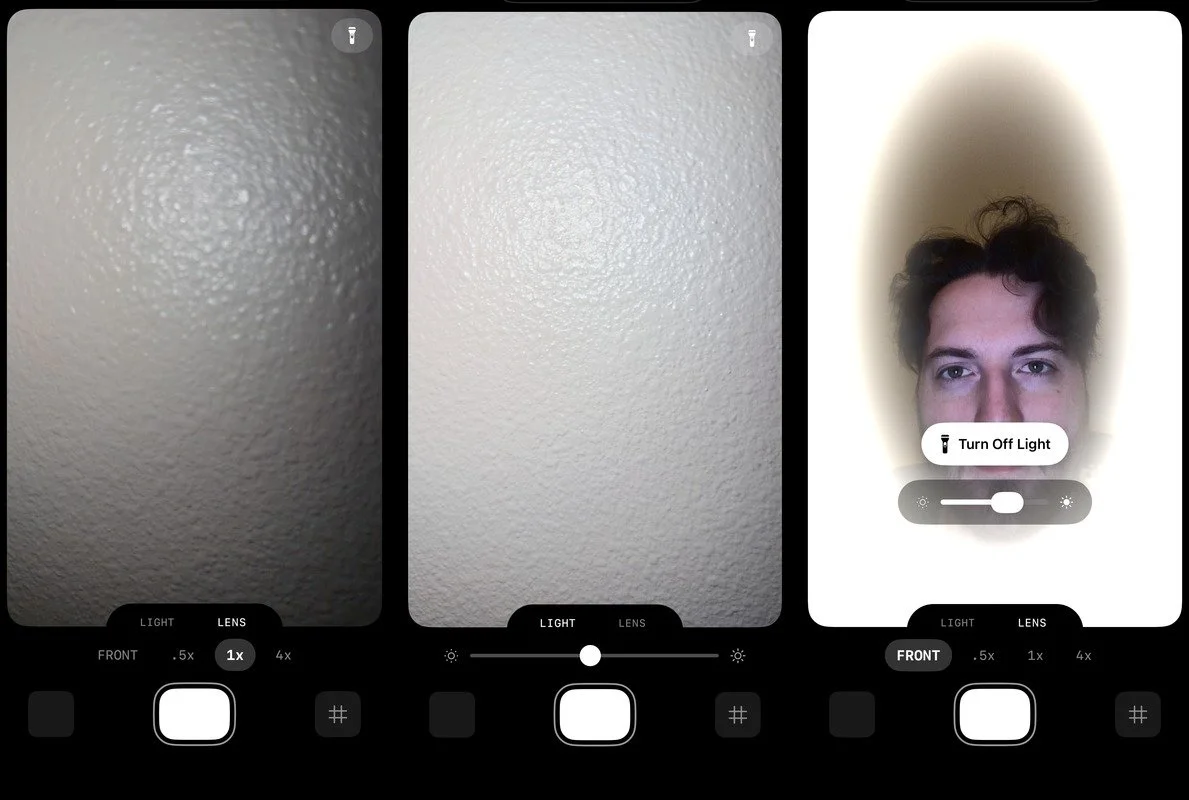
The ring light problem
One more rabbit hole, because this project was full of them. I wanted a software ring light for low-light selfies, using the screen itself as illumination. The obvious approach is maximizing screen brightness, which works fine for standard SDR content.
But OLED displays can go brighter than SDR allows. Extended Dynamic Range lets you push pixel values above 1.0, accessing the panel's peak luminance capabilities. Standard SwiftUI can't do this. You need a Metal pipeline with rgba16Float pixel format, a CAMetalLayer with wantsExtendedDynamicRangeContent enabled, and the extendedLinearDisplayP3 color space.
The result is a warm cream-colored ring light, not the clinical blue of digital flashes, running at up to 2000 nits on capable displays. A radial gradient keeps the center transparent so you can still see the viewfinder. It's a small feature, but it required understanding the entire HDR pipeline to implement correctly.
The design
Natural Photo has two tabs: Lens and Light.
Lens switches between your available lenses. Light adjusts exposure. The design is deliberately simple and opinionated, with a signature notched tab element.
What it means
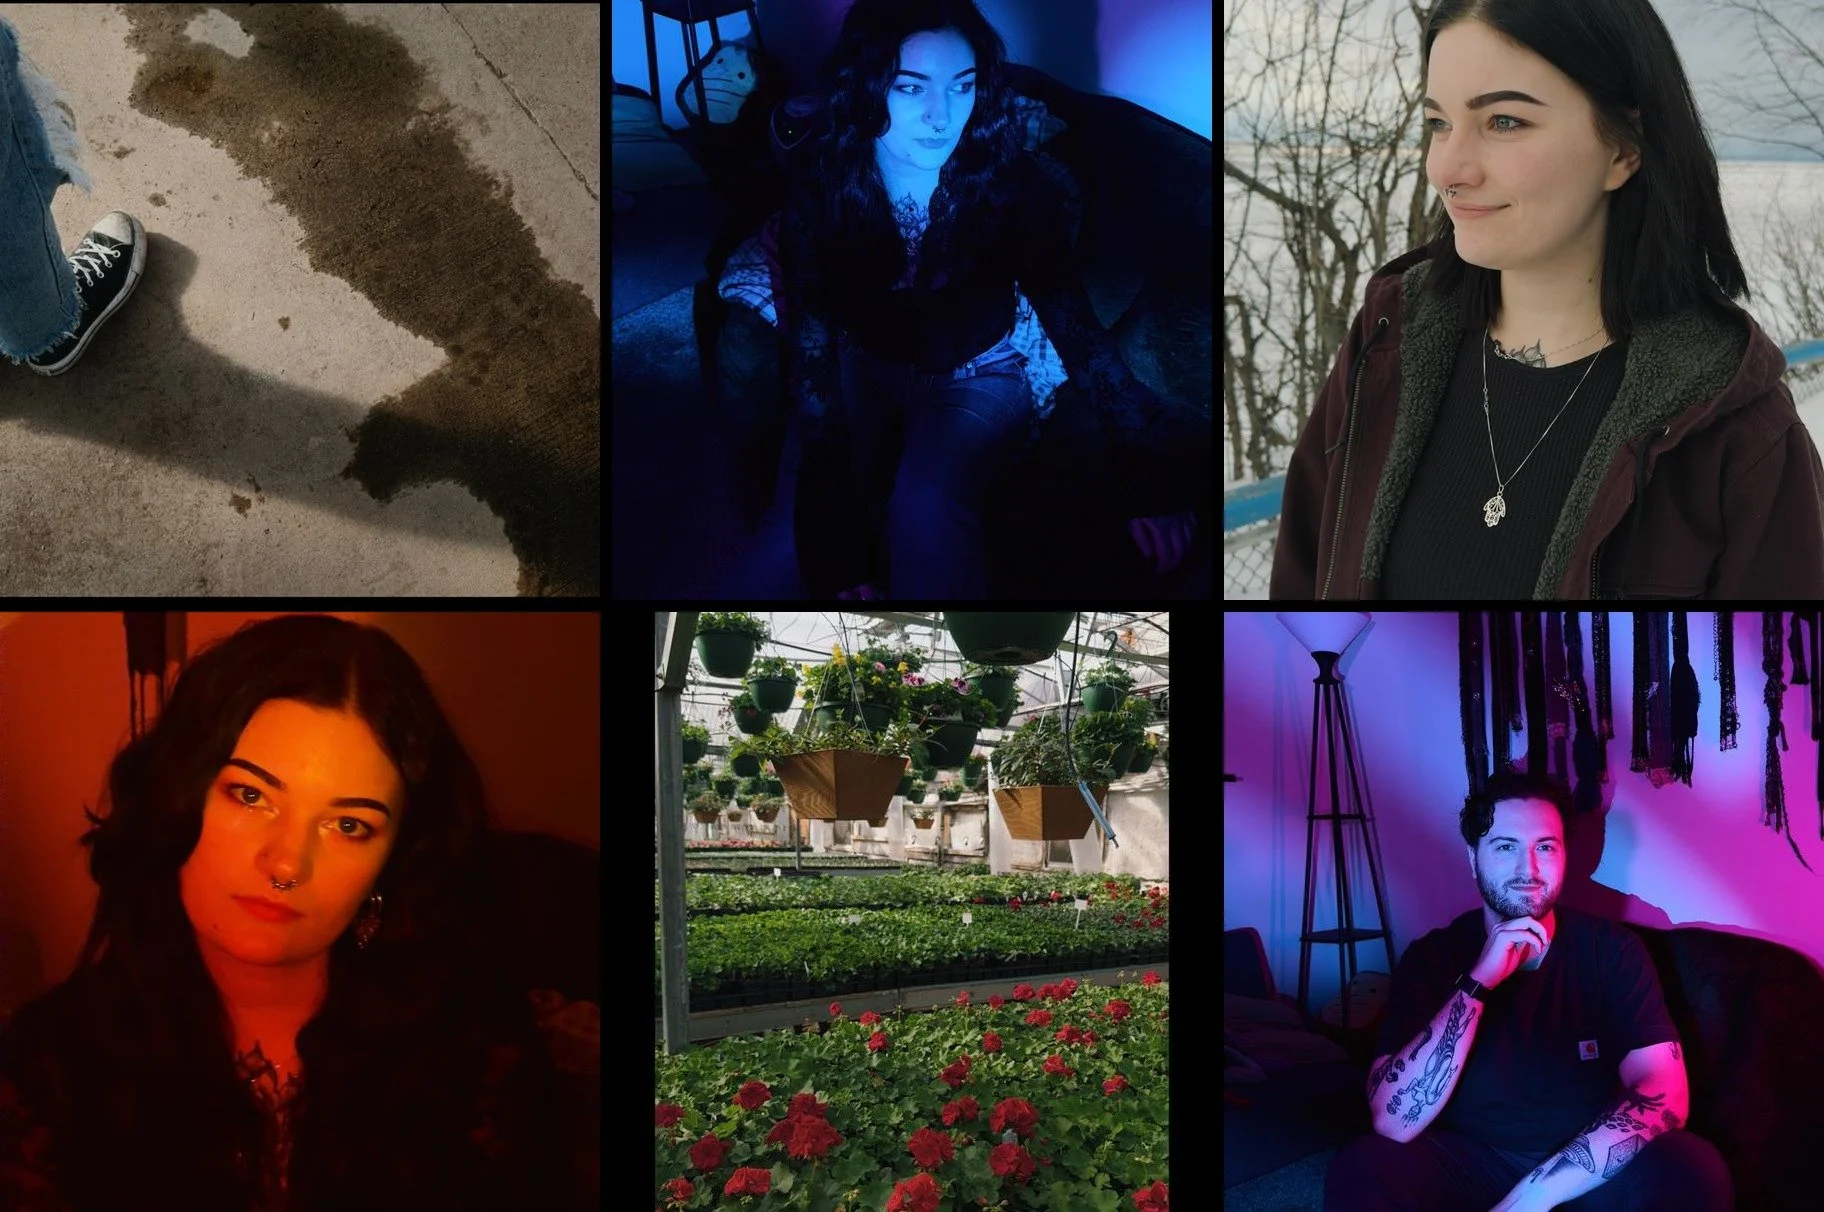
I hardly bring my full camera with me anymore. For the shooting conditions where this approach works, daylight to moderate low-light, situations where you'd previously need serious equipment or serious knowledge to get good results, this solution gets there. The images have the character I spent years developing in my color science, applied automatically, with none of the computational processing that makes iPhone photos look like iPhone photos.
Night mode isn't supported. You can't do true long exposures through a video pipeline, physics wins. It's not a one-size-fits-all solution. But it's a very specific solution for a very specific sensibility, and for that sensibility, it works.
One thing that changed since I first shipped: the app originally required an iPhone 15 Pro or newer, since Apple Log is a Pro-only feature. That bothered me. The color science was the thing I cared about most, and gating it behind one capture format felt unnecessarily narrow. So I built a tiered format negotiation system. On Pro devices, you get the full Apple Log pipeline with extra stops of dynamic range. On non-Pro devices from the iPhone 12 forward, the app falls back to HLG 10-bit capture, which still gives you my LUT, my color science, the same look, just with less latitude in the extremes. You lose some of the headroom that makes Apple Log special, but you gain the thing that actually matters most: images that don't look like iPhone images. That tradeoff felt right.
After years of taking screenshots from graded video like some kind of barbarian, I can just tap a shutter button. The images look the way I want images to look. The tool does what I always wanted it to do.
That's enough for now.